FX Control
What is the FX Control?
After five years of making and developing Chuffers to give the best and loudest sound, we developed the FX Control to fit many locos which will allow you to control the sound effects and the steam effects from your loco.
The FX control is a precision engineered cap to fit the top of the Chuffer resonator, which has a hole drilled in the cap. The FX Control has a large hole and a small hole and by turning the control with a screwdriver you have three options:
- Both holes closed: This is always selected for start up as it diverts all the oil and water condensate down. When this has cleared, the Chuffer behaves as normal and gives the maximum chuff.
- Small hole open: This gives a softer edge to the chuff and is slightly higher pitched and quieter. It also enhances the steam effects by increasing the plume of steam.
- Large hole open: This gives a much softer and quieter Chuff which will be only slightly louder than a standard exhaust (depending on the loco). The benefit is that you will get the maximum steam effect which will be perfect for Winter and low sun photography. It is also great for indoor running where some folk have been known to huff and puff about too much Chuff…
Here is a video I made for the launch of the FX Control back in 2014 (when there were only 55 versions of the Chuffer!
Will it fit my loco?
The FC Control is designed to fit on the standard 1/4″ diameter Chuffer where it is used in a chimney large enough to take the slight increase in diameter without restricting the breathing. Where there is limited chimney space, we can offer the option of the 7/32″ Chuffer as an exchange. With this, the diameter will remain the same with the FX Control fitted.
To see if it will fit your loco, please go to the lists on the Chuffers page from the top menu.
Can I fit one to my existing Chuffer?
If you are a skilled model engineer with a lathe, and if your loco is listed as being suitable on the Chuffers page, then yes. Please scroll down to see the instructions.
Here are two videos showing the FX Control in action. The first is with a Roundhouse Katie and the second with a modified Accucraft Ragleth
Instructions for fitting FX Control to a standard Chuffer
First a few very important points:
- Please remember that the FX Control is not suitable for all locos. Please check the lists for the latest information.
- Home fitting is only possible for those locos where the standard 1/4″ Chuffer is used and where there is sufficient room in the chimney for the loco to breathe. If your loco already uses the smaller, 7/32″ chuffer, there will almost certainly not be room for the FX Control. Where the space is already limited for the 1/4″ Chuffer, Nigel Garrett will fit an exchange 7/32″ Chuffer and FX Control for you.
- Home fitting is really only only appropriate for folk with model engineering skills and access to a good quality lathe. Although the Summerlands Chuffer is precision engineered, the top of the chuffer resonator simply has a cap pressed in and silver soldered – resulting in a slight swelling of the body and a less than perfectly flat top. This needs to be trued up on the lathe and then the Control must be precision fitted to give a very close, but smooth, free turning fit.
- The fit must allow free turning with no hard spots. This will ensure that on a threaded fitting e.g. Accucraft, there will be no strain on the thread.
- If you are using it on one of the tube fitting SCGP Chuffers, you will have to ensure this is a tight fit on the exhaust. Either put a slight bend in the copper exhaust so that it grabs, or make a slight groove round the tube by gently using wire cutters.
Please read the instructions below and if you are in any doubt about your ability to do this, please just send your chuffer to Nigel Garrett at DP Supplies and he will do the job for you.
Before starting, please remember that the resonator walls are only 1/64″ thick and have been anealed in the manufacturing process. While the Chuffer is robust enough for a lifetime of use, it would be easily damaged in a lathe.
1. You will need to start by making a collet to protect the Chuffer in the lathe chuck. Take a piece of K&S 9/32″ OD tube about 30mm long. Clean up the ends and then cut it longitudinally with a razor saw. This will grip and protect the chuffer body in the three jaw chuck.
2. With the Chuffer in the collet, mount it so that just about 5mm is protruding. Using a sharp cutting tool, correctly adjusted so as not to leave a nib, square off the end. It is not good enough to leave a nib and then take this off with a power sander!
3. When the end is true, ease the chuffer out to about 10mm and true up the diameter at the end using a number of very fine cuts. The aim is to bring it back to the same diameter as the body of the chuffer and no less. Try the cap every few passes to see if it will fit. You are only removing a tiny amount and at this stage you are aiming for a tight fit.
4. Now ease the chuffer out to expose 25mm of the resonator and using either a smooth file or 600 grade abrasive paper, gently dress the outer surface of the chuffer until the Chuffer will just slide on. Then change to 1200 grade and continue until the fit is perfect and the Control turns smoothly but will not drop off. Make sure you take great care and oberve all appropriate safety precautions when doing this.
5. When you are satisfied with the fit, it is time to drill the Chuffer cap. You need to drill a 2.2mm diameter hole through the cap with the centre offset 1.5mm from the centre. If you plan to fit a number of these, then I recommend constructing a simple jig to ensure the correct placement.
Where you are drilling an SCRH1 Chuffer, it is best to have the hole either at the front or back for ease of location when the cap is in position.
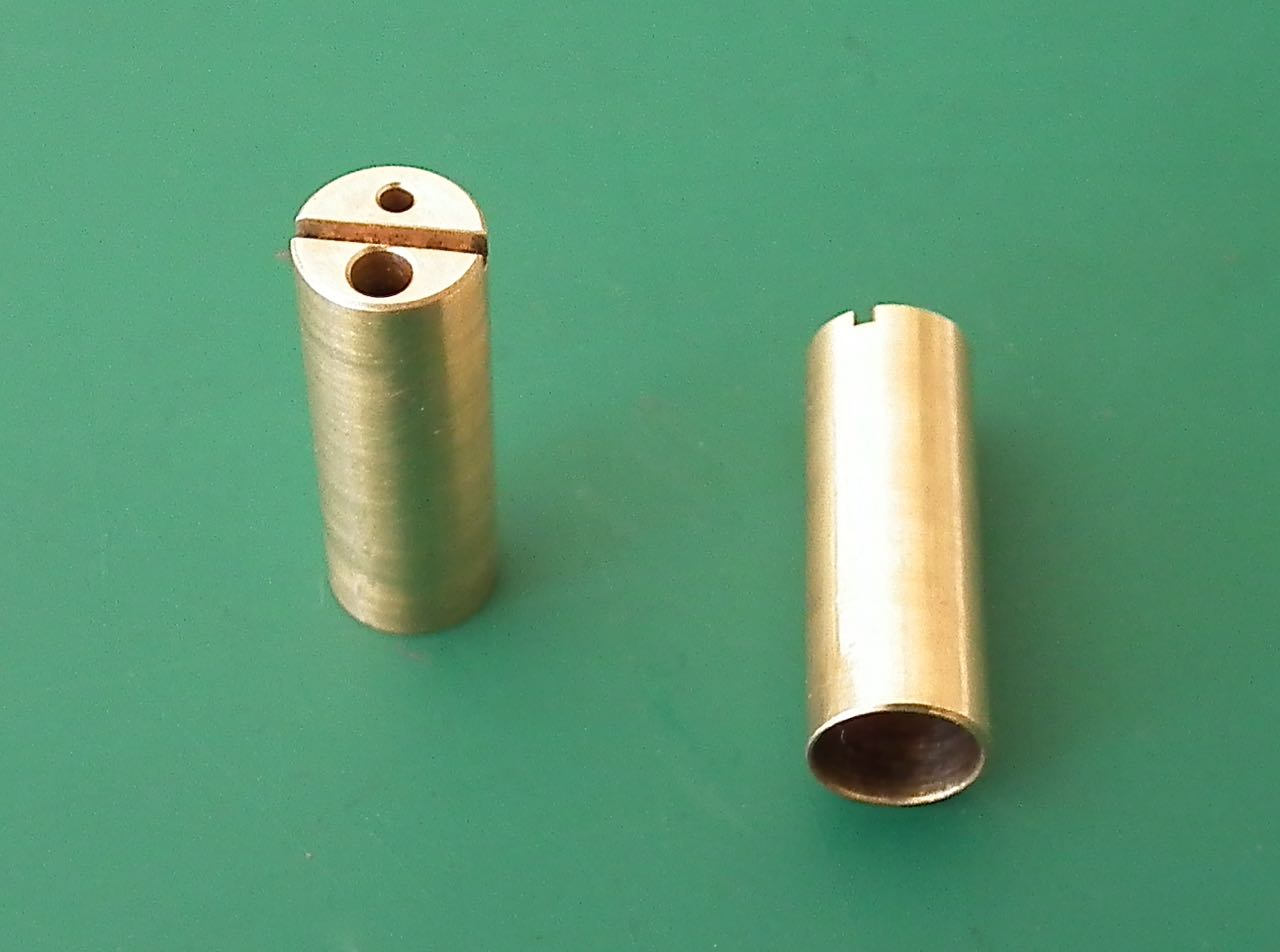
Do not use either of the holes in the FX Control as a guide as this will result in you drilling down through the wall of the Chuffer (see photo right!). If you plan to hold it in the soft jaws of a vice to do this, then use the collet you have made. Mark the point carefully and do not use an automatic centre punch as most are too severe for this.
If the chuffer has a screwdriver slot, this will be fine, but if it is at all off centre, use the larger side for the hole.